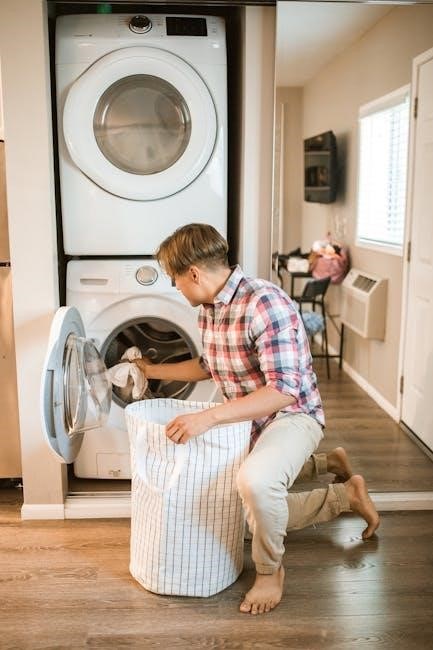
GE washing machine troubleshooting manuals provide comprehensive guides to diagnose and resolve common issues, ensuring optimal performance and extending appliance lifespan․ These resources cover various problems, from drainage to noise, empowering users to address malfunctions confidently․
By following step-by-step instructions, users can identify root causes and implement fixes, minimizing downtime and the need for professional assistance․ These manuals are essential for maintaining efficiency and functionality․
Common Issues in GE Washing Machines
GE washing machines often face issues like not draining, leaking, loud noises, bad odors, frequent locking/unlocking, and spinning problems․ These are usually resolvable with basic troubleshooting steps․
2․1․ GE Washer Not Draining
If your GE washer isn’t draining, it could be due to a clogged drain pump filter, kinked drain hose, or blockages in the plumbing․ Regularly cleaning the filter and ensuring the drain hose is properly positioned can prevent this issue․ Additionally, using high-efficiency detergent and checking for suds buildup, which can interfere with drainage, is recommended․ If the problem persists, resetting the washer or checking for error codes may help identify the root cause․ Addressing this issue promptly can prevent further damage and ensure smooth operation․
2․2․ GE Washer Leaking
A leaking GE washer can be caused by using too much detergent, improper detergent type, or issues with the drain system․ High-efficiency detergents are recommended to prevent suds buildup, which can lead to leaks․ Check the drain pump filter for blockages and clean it regularly․ Additionally, inspect the drain hose for kinks or damage and ensure it’s properly connected․ If the washer is overloaded, water may leak during the cycle․ Addressing these issues promptly can prevent further damage and maintain optimal performance․ Regular maintenance, such as checking seals and gaskets, can also help prevent leaks and ensure smooth operation․
2․3․ GE Washer Making Loud Noise
A GE washer making loud noises can be caused by an unbalanced load, faulty suspension rods, or issues with the drain system․ Ensure the washer is level and the load is evenly distributed to prevent vibrations․ Check for loose items that may rattle during cycles․ If the noise persists, inspect the drain pump filter for blockages or debris, as a clogged filter can cause unusual sounds․ Additionally, worn-out suspension rods or bearings may need replacement․ Regular maintenance, such as cleaning the pump filter and ensuring proper installation, can help minimize noise and maintain smooth operation․ Addressing these issues promptly will restore quiet functionality․
2․4․ GE Washer Smelling Bad
A GE washer emitting a bad odor is often due to mold and mildew buildup, typically caused by detergent residue, moisture, and infrequent cleaning․ Regularly leaving the lid closed after use can trap moisture, creating an environment for odors to develop․ To address this, run a cleaning cycle with vinegar or baking soda to eliminate bacteria and freshen the interior․
Additionally, check and clean the gasket and drain pump filter, as debris can accumulate and cause unpleasant smells․ Ensuring proper ventilation and leaving the lid open after cycles can help prevent moisture buildup and maintain a fresh scent․ Regular maintenance is key to avoiding persistent odors and keeping your GE washer hygienic․
2․5․ GE Washer Locks and Unlocks Frequently
A GE washer that frequently locks and unlocks may indicate issues with the lid lock mechanism or door sensor․ This problem can occur due to faulty sensors, a malfunctioning control board, or power supply disruptions․ Check if the lid is properly aligned and closed securely, as misalignment can trigger the lock feature repeatedly․
To troubleshoot, reset the washer by unplugging it for 30 minutes to clear any electrical glitches․ If the issue persists, inspect the door switch and sensor for damage or debris․ Cleaning the sensor area or replacing faulty components may resolve the problem․ If not, consulting a professional is recommended to avoid further complications․
2․6․ GE Washer Not Spinning or Pausing
If your GE washer isn’t spinning or keeps pausing, it may be due to an unbalanced load, power supply issues, or faulty components․ Check if the load is evenly distributed, as imbalance can cause the washer to vibrate excessively and pause․ Ensure the power supply is stable and the outlet is functioning properly․
The lid switch might also be malfunctioning, preventing the washer from spinning․ Try closing the lid firmly․ If these steps don’t resolve the issue, there could be problems with the motor or control board, requiring professional assistance․
Essential Tools and Safety Precautions for Troubleshooting
Before troubleshooting your GE washing machine, gather essential tools like a screwdriver, pliers, and a multimeter for electrical checks․ A bucket or towels are handy for water leaks․ Always unplug the washer to ensure safety․
Wear protective gloves and eyewear․ Never attempt repairs with water in the tub or while the machine is operational․ Ensure the washer is empty and stable․ If unsure, consult the manual or a professional․

Step-by-Step Diagnostic Process
Start by checking the power supply, water supply, and drainage․ Assess load balance and control functions․ Identify error codes and refer to the manual for guidance․
4․1․ Checking Power Supply and Controls
Ensure the washing machine is properly plugged into a functioning outlet․ Verify that the circuit breaker hasn’t tripped and reset it if necessary․ Check the power cord for any visible damage or frays․ Test the control panel for responsiveness by cycling through settings․ If the display is unlit or unresponsive, a power issue or faulty control panel may be the cause․ Consult the manual for specific diagnostic steps related to your model․ Always unplug the machine before performing internal inspections to ensure safety․ Power supply issues are often the root of non-starting problems․ Addressing these first can resolve many common malfunctions quickly․
4․2․ Inspecting Water Supply and Drainage
Inspect the water supply hoses for kinks, blockages, or damage․ Ensure they are securely connected to both the washer and water supply valves․ Check the water pressure and verify that the valves are fully open․ For drainage, examine the drain hose for kinks or clogs and ensure it is properly secured to the drain pipe․ If the washer isn’t draining, check the pump filter for debris․ Regularly cleaning the filter can prevent blockages․ Also, ensure the drain hose is elevated to prevent water from flowing back into the washer․ Addressing water supply and drainage issues can resolve problems like poor washing performance or leakage․
4․3․ Assessing Load Balance and Distribution
Assessing load balance is crucial for optimal washing machine performance․ An uneven load can cause vibrations, noise, or poor spinning․ Start by checking if the load size is appropriate—neither too small nor too large․ Redistribute clothes to ensure even weight distribution․ If the washer vibrates excessively, it may indicate an imbalance․ Check if the machine is properly leveled; adjust the legs if necessary․ For large or bulky items, add smaller garments to balance the load․ Regularly monitoring load balance helps prevent damage and ensures efficient operation․ A well-distributed load enhances washing effectiveness and prolongs the appliance’s lifespan․
Understanding Error Codes on GE Washing Machines
GE washing machines display error codes to identify specific issues, helping users troubleshoot effectively․ These codes provide clear insights into problems like drainage, sensor malfunctions, or imbalanced loads․
Understanding these codes allows for quick diagnosis and resolution, minimizing downtime and ensuring efficient operation․ GE provides detailed resources to interpret and address each error code promptly and accurately․
5․1․ Common Error Codes and Their Meanings
GE washing machines use specific error codes to indicate issues, such as Sd for suds detection, PF for power failure, or LC for leak detection․ These codes guide users to the root cause․
For instance, Sd signals excessive suds preventing proper drainage, while PF suggests a power interruption․ Understanding these codes helps in addressing problems like imbalanced loads or faulty sensors effectively․
Referencing GE’s official resources or manuals provides detailed explanations and solutions for each code, empowering users to resolve issues quickly and maintain their appliance’s performance․
5․2․ How to Reset Your GE Washing Machine
Resetting your GE washing machine can often resolve software glitches or minor operational issues․ To reset, unplug the washer from the power outlet and wait for 30 seconds to clear its memory․
Plug the machine back in and ensure the power cord is securely connected․ Run a test cycle to check if the issue is resolved․ If problems persist, consult the user manual or contact a professional for further assistance․
Advanced Troubleshooting Techniques
Advanced troubleshooting involves using diagnostic modes, specialized tools, and in-depth error analysis to identify complex issues beyond basic fixes․
These techniques help resolve persistent problems, ensuring your GE washer operates efficiently and effectively, even with challenging malfunctions․
6․1․ Using Diagnostic Modes
GE washing machines feature advanced diagnostic modes designed to help users identify and address complex issues efficiently․ By activating these modes, typically through specific button sequences, you can access detailed error codes and run component tests․ This allows for precise troubleshooting, eliminating guesswork․ Diagnostic modes provide real-time insights into system performance, highlighting faulty parts or software glitches․ They are particularly useful for resolving intermittent problems or errors not covered in basic troubleshooting guides․ Always refer to your manual for the exact activation process, as procedures may vary between models․ Mastering diagnostic modes empowers you to resolve issues confidently and maintain your washer’s optimal performance․ Regular use of these tools can prevent minor issues from escalating into major repairs, ensuring longevity and reliability․ By leveraging diagnostic capabilities, you gain a deeper understanding of your appliance’s inner workings, enabling proactive maintenance and timely interventions․ This advanced approach ensures your GE washer operates smoothly, minimizing downtime and enhancing overall functionality․ Additionally, diagnostic modes often include self-test routines that simulate cycles, helping pinpoint specific malfunctions quickly․ These features are invaluable for DIY enthusiasts and professionals alike, streamlining the troubleshooting process and reducing reliance on external support․ Overall, utilizing diagnostic modes is a powerful way to maintain your GE washing machine’s health and ensure uninterrupted service․ By familiarizing yourself with these tools, you can address a wide range of issues with confidence and precision, extending the life of your appliance․ Regular use of diagnostic modes also helps identify potential problems before they become critical, allowing for preventive measures․ This proactive approach not only saves time but also reduces the cost of repairs over time․ Moreover, diagnostic modes provide a comprehensive overview of system health, enabling users to make informed decisions about maintenance and repairs․ With these advanced tools, you can troubleshoot like a professional, ensuring your GE washer continues to deliver exceptional performance for years to come․ By incorporating diagnostic modes into your maintenance routine, you can enjoy a more efficient and reliable laundry experience․ This section highlights the importance of leveraging these advanced features to maximize your appliance’s potential and address issues effectively․ By doing so, you can ensure your GE washing machine remains in top condition, providing consistent and high-quality results․ Ultimately, mastering diagnostic modes is a key aspect of maintaining your washer’s health and extending its lifespan․ This is a critical skill for anyone looking to troubleshoot and repair their GE washing machine independently․ By understanding and utilizing these modes, you can resolve complex issues with ease, ensuring your appliance runs smoothly for years to come․
6․2․ Identifying Faulty Parts
Identifying faulty parts in your GE washing machine is crucial for effective troubleshooting․ Common issues often stem from worn or damaged components like the drain pump, motor, or suspension rods․ To pinpoint the problem, start by running a diagnostic cycle or checking error codes․ These can indicate which part may be failing․ For example, excessive noise could point to a faulty motor or unbalanced drum, while leaking might signal a damaged tub seal or hose․ Always refer to your manual for specific guidance on testing and replacing parts․ Regular maintenance, such as cleaning filters and checking connections, can also help prevent parts from failing․ By identifying and addressing faulty components early, you can restore your washer’s performance and avoid costly repairs․ This step is essential for ensuring your appliance operates efficiently and reliably․
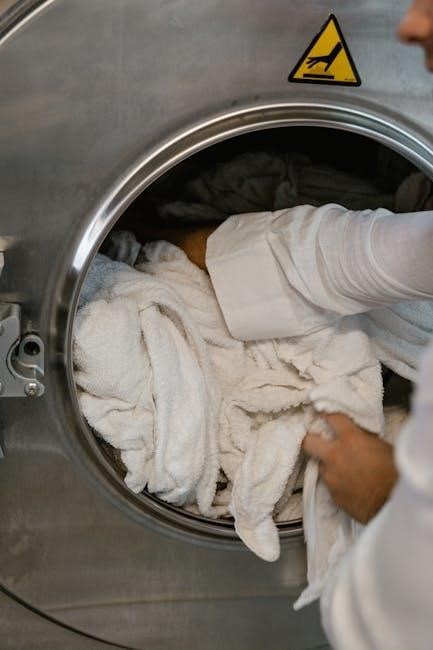
Maintenance Tips to Prevent Future Issues
Regular maintenance is key to preventing issues with your GE washing machine․ Start by cleaning the gasket and detergent dispenser monthly to remove mold and buildup․ Check and replace worn-out hoses and belts to avoid leaks or mechanical failures․ Ensure the washer is properly leveled to maintain balance during cycles․ Regularly inspect and clean the drain pump filter to prevent clogs and drainage problems․ Additionally, always use the recommended detergent type and amount to avoid suds buildup․ Leaving the lid open after use allows the interior to dry, reducing odors and mildew growth․ By following these simple maintenance tips, you can extend your washer’s lifespan and prevent common issues from arising․

When to Call a Professional
If you encounter complex issues beyond basic troubleshooting, such as persistent error codes, electrical malfunctions, or significant mechanical damage, it’s best to contact a certified technician․ Professionals can diagnose and repair internal components like the motor, control board, or transmission, which are beyond DIY fixes․ Additionally, if you’ve tried multiple troubleshooting steps without success or if the problem recurs frequently, seeking expert help is advisable to prevent further damage or safety hazards․ A qualified technician can ensure repairs are done safely and efficiently, preserving your washer’s performance and warranty․