The Honeywell Pro Series Thermostat offers advanced temperature control, smart home integration, and energy-saving features. Designed for ease of use, it ensures efficient heating and cooling management, making it ideal for both homeowners and professionals seeking precise climate control and smart functionality.
1.1 Overview of the Honeywell Pro Series Thermostat
The Honeywell Pro Series Thermostat is a cutting-edge, user-friendly device designed to regulate heating and cooling systems efficiently. It features advanced temperature control, smart home integration, and energy-saving modes. Compatible with various HVAC systems, it ensures precise climate management. The thermostat is known for its sleek design, intuitive interface, and programmable scheduling options. It supports geofencing and remote access, making it ideal for modern smart home upgrades. With its robust functionality and ease of installation, the Honeywell Pro Series is a popular choice for both homeowners and professionals seeking reliable temperature control solutions.
1.2 Importance of Proper Installation
Proper installation of the Honeywell Pro Series Thermostat is crucial for ensuring optimal performance, safety, and energy efficiency. Incorrect installation can lead to malfunctioning, increased energy bills, or even system damage. Following the installation manual carefully guarantees correct wiring, alignment, and setup, preventing potential issues like overheating or connectivity problems. Proper installation also ensures compliance with safety standards and warranty terms, providing long-term reliability and efficiency for your HVAC system. Always refer to the official Honeywell Pro Series Thermostat manual for step-by-step guidance to avoid common mistakes and ensure a smooth setup process.
System Requirements and Compatibility
The Honeywell Pro Series Thermostat is compatible with various HVAC systems, including heat pumps and single-stage compressors, supporting smart home upgrades for efficient temperature control and energy management.
2.1 Compatible HVAC Systems
The Honeywell Pro Series Thermostat is compatible with a wide range of HVAC systems, including gas furnaces, heat pumps, and air conditioning units. It supports single-stage compressors and is ideal for systems requiring precise temperature control. The thermostat is also suitable for heat pump configurations, with specific models like the TH6220WF accommodating single-stage compressors when set up as heat pumps. This versatility ensures the Honeywell Pro Series can integrate seamlessly with various home heating and cooling systems, providing efficient and reliable performance.
2.2 Electrical Requirements
The Honeywell Pro Series Thermostat requires a 24V AC power supply, which is standard for most HVAC systems. Ensure the system has a common wire (C-wire) for proper operation, especially for smart features. If your system lacks a C-wire, consider using a C-wire converter or a battery-powered thermostat as an alternative. Always turn off power at the breaker box before installation to avoid electrical hazards. Proper electrical connections are crucial for the thermostat to function correctly and maintain energy efficiency.
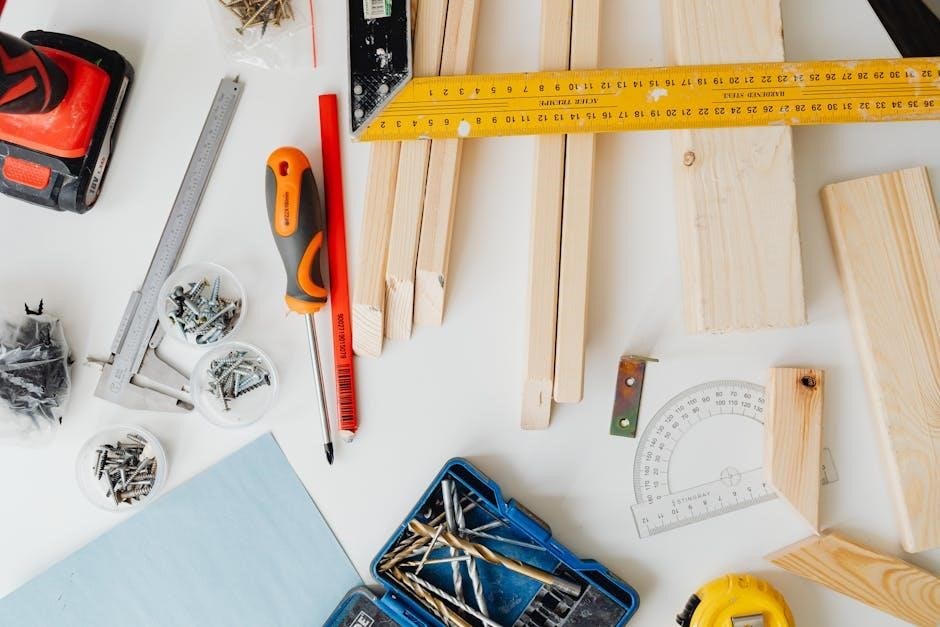
Tools and Materials Needed
Essential tools: screwdriver, drill, level, and wire strippers. Materials: wires, screws, wall anchors, and the UWP module for secure installation. Ensure compatibility with your system.
3.1 Essential Tools for Installation
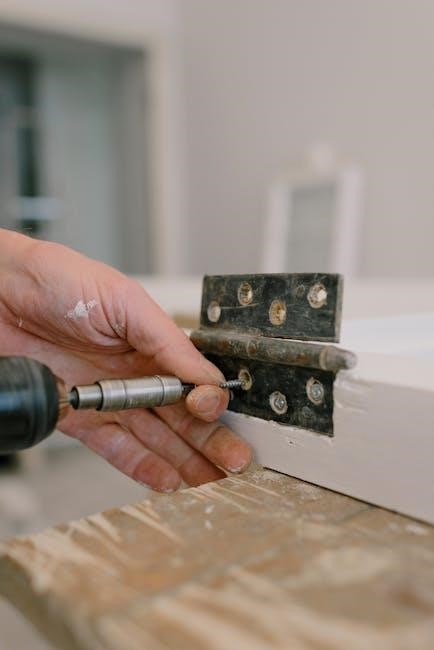
To install the Honeywell Pro Series Thermostat, you will need a few essential tools. Start with a screwdriver for removing the old thermostat and securing the new one. A drill may be necessary for making holes in the wall. A level ensures proper alignment during mounting. Wire strippers are useful for preparing wires, and a voltage tester can verify power is off. Additionally, a pencil and masking tape can help mark wire locations. Having these tools ready will streamline the installation process and ensure accuracy.
3.2 Additional Materials Required
Beyond the essential tools, you may need additional materials to complete the installation. These include an optional cover plate for a sleek finish, screws for securing the thermostat, and wall anchors for extra support. Adhesive strips or double-sided tape can help mount the thermostat without drilling. If your wiring setup requires it, jumper wires or connectors may also be necessary. Ensure all materials are compatible with your specific Honeywell Pro Series model to avoid installation issues and maintain proper functionality.
Pre-Installation Steps
Turn off power at the breaker box, prepare the wall and electrical box, remove the old thermostat, and label wires to ensure a smooth installation process.
4.1 Turning Off Power at the Breaker Box
Before starting the installation, locate the breaker box and switch off the power to the HVAC system. Verify the thermostat is unpowered by checking for any lit displays or active functions. This step ensures electrical safety during the process. Always double-check the correct breaker, as multiple circuits may be present. Once confirmed, proceed with the installation steps. Never attempt to work on live electrical systems to avoid potential shocks or injuries. Safety is paramount in any electrical project.
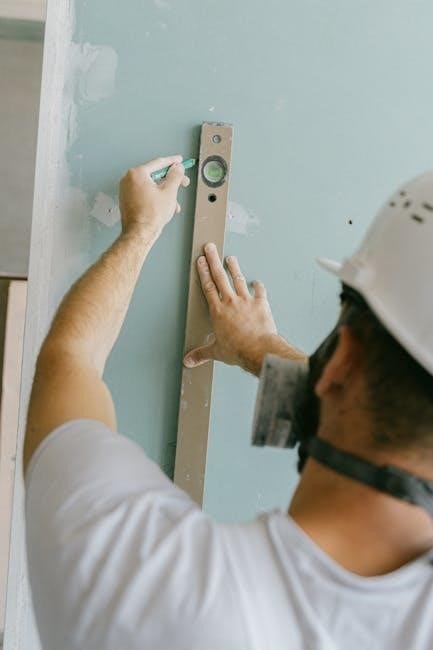
4.2 Preparing the Wall and Electrical Box
Ensure the wall surface is clean, dry, and level before proceeding. Inspect the electrical box for any damage or loose connections. If using the optional cover plate, remove the gray trim ring from the thermostat. Mount the junction box adapter to the wall or electrical box using the provided screws, ensuring it is level. This step guarantees a secure and proper fit for the thermostat. Verify all surfaces are prepared correctly to avoid installation issues later. Proper preparation ensures a stable base for the Honeywell Pro Series Thermostat.
4.3 Removing the Old Thermostat
Start by turning off the power to the HVAC system at the breaker box. Gently pull the old thermostat away from the wall to access the wires. Carefully disconnect the wires from the thermostat, taking note of their colors and positions. Handle the wires with care to avoid damage. Once the wires are free, remove the old thermostat from the wall. Do not remove the wires from the electrical box. This step ensures a clean and safe transition to the new Honeywell Pro Series Thermostat installation.
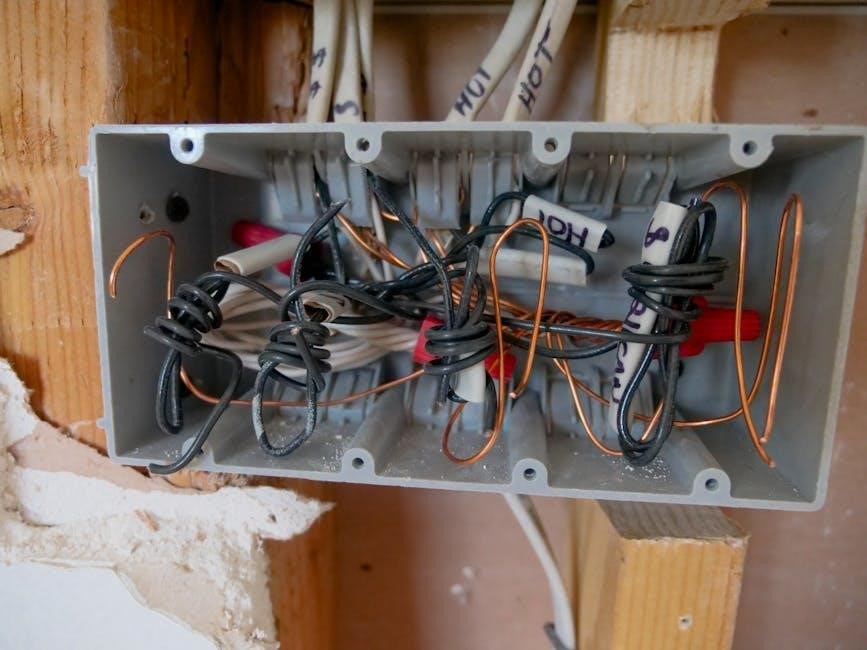
4.4 Labeling the Wires
After disconnecting the wires from the old thermostat, label each wire according to its function (e.g., R, W, Y, G, C). Use the labels provided in the Honeywell Pro Series kit or create your own. This step is crucial for ensuring correct connections during the new thermostat installation. Color-coding can also help identify the wires later. Secure the labels tightly to prevent them from peeling off. Double-check the labels for accuracy before proceeding to avoid wiring errors. Proper labeling ensures a smooth and error-free installation process.
Mounting the Thermostat
Align the UWP with the thermostat and gently push until it snaps into place. Ensure the UWP door closes without bulging. For the optional cover plate, remove the gray trim ring before mounting.
5.1 Aligning the UWP with the Thermostat
Align the Universal Wall Plate (UWP) with the Honeywell Pro Series Thermostat, ensuring proper fitment. Gently push the thermostat onto the UWP until it clicks securely into place. Make sure the UWP door closes without bulging, indicating correct alignment. If using the optional cover plate, remove the gray trim ring from the thermostat before this step to avoid interference. Proper alignment ensures a flush mount and seamless integration with your wall, providing a professional finish to the installation.
5.2 Securing the Thermostat to the Wall
To secure the Honeywell Pro Series Thermostat, ensure it is properly aligned with the Universal Wall Plate (UWP). Use the provided screws to fasten the thermostat firmly to the wall. If using the optional cover plate, remove the gray trim ring beforehand for a proper fit. Check that the UWP door closes smoothly without bulging, indicating correct alignment. Tighten the screws snugly to avoid over-tightening, which could damage the device or wall. Ensure the thermostat is level for a professional finish and accurate temperature sensing. If necessary, use appropriate wall anchors based on your wall type for added stability. Finally, verify that the thermostat is securely mounted before proceeding to the wiring step.
5.3 Ensuring Proper Alignment and Fit
After securing the thermostat, verify its alignment and fit. Align the Universal Wall Plate (UWP) with the thermostat, ensuring it snaps into place smoothly. Check that the UWP door closes without bulging, indicating proper alignment. Use a spirit level to confirm the thermostat is straight. Ensure no wires or debris obstruct the fit. If using the optional cover plate, remove the gray trim ring beforehand for a seamless installation. Proper alignment ensures accurate temperature sensing and a professional appearance. Double-check all connections and the thermostat’s position before proceeding to wiring.
Wiring the Thermostat
Wiring the Honeywell Pro Series Thermostat involves understanding connections, securing wires properly, and verifying configurations to ensure smooth system operation and optimal performance.
6.1 Understanding the Wire Connections
Understanding the wire connections is crucial for proper thermostat installation. Each wire corresponds to a specific function, such as heating, cooling, or fan control. The wires are typically color-coded, with common colors like red for heat, white for heat pump, and yellow for cooling. Refer to the thermostat’s wiring diagram to match each wire to the correct terminal. Ensure all connections are secure and properly seated to avoid malfunctions. Miswiring can lead to system issues, so double-check connections before proceeding with installation.
6.2 Connecting the Wires to the Thermostat
Connect the wires to the thermostat by matching each wire to the corresponding terminal, as indicated in the wiring diagram. Gently push the wires into the terminals until they click securely. Ensure no wires are loose or misaligned, as this could cause system malfunctions. Double-check the connections to confirm they align with the diagram and your HVAC system’s requirements. Proper wire connections are essential for the thermostat to function correctly and control your heating and cooling systems effectively.
6.3 Verifying the Wiring Configuration
After connecting the wires, verify the configuration by reviewing the wiring diagram and ensuring all connections match. Check that no wires are loose or misconnected, as this could lead to system malfunctions. Turn the power back on at the breaker box and test the thermostat by switching between heating and cooling modes to confirm proper operation. Ensure the display lights up and responds to input. If any issues arise, revisit the connections and consult the manual or troubleshooting guide for resolution.
Setting Up the Thermostat
After installation, power on the thermostat and follow on-screen prompts to set up basic configurations. Program your desired temperature schedule to optimize comfort and energy efficiency.
7.1 Initial Power-On and Setup
After installation, turn the power on at the breaker box. The thermostat will automatically power on and begin the setup process. Ensure the display is responsive by touching the screen. Follow the on-screen prompts to select your equipment type, such as a heat pump or furnace, and configure basic settings like temperature units (°F or °C). If applicable, select the number of heating or cooling stages. Once initial setup is complete, the thermostat will be ready to regulate your HVAC system effectively.
7.2 Configuring Basic Settings
Navigate to the setup menu on the thermostat to configure basic settings. Select your preferred temperature units (°F or °C) and adjust the temperature range limits. Choose the number of heating and cooling stages based on your HVAC system. Set the fan operation to auto or continuous for consistent airflow. Adjust the date and time, and enable or disable features like geofencing or smart recovery. Ensure all settings align with your system’s capabilities and your comfort preferences for optimal performance.
7.3 Setting Up the Programmable Schedule
Create a weekly schedule by selecting each day and setting preferred temperatures for different times. Use the touchscreen or app to assign temperature points for morning, afternoon, evening, and night. Ensure the schedule aligns with your daily routine for energy efficiency. Enable features like smart recovery to pre-cool or pre-heat your home. Save your schedule to apply it automatically. Review and adjust as needed to maintain comfort and optimize energy usage throughout the week.

Advanced Features and Configuration
Explore smart home integration, geofencing, and remote access for seamless control. Utilize energy-saving modes to optimize efficiency and reduce energy consumption effortlessly.
8.1 Smart Home Integration
The Honeywell Pro Series Thermostat seamlessly integrates with popular smart home systems like Amazon Alexa and Google Assistant. This allows for voice control and remote temperature management through the Honeywell Home app. Users can easily connect their thermostat to smart hubs, enabling advanced automation and energy-saving features. The thermostat also supports geofencing, adjusting temperatures based on your location. With smart home integration, you can optimize energy usage, receive alerts, and enjoy a more convenient heating and cooling experience from anywhere.
8.2 Geofencing and Remote Access
The Honeywell Pro Series Thermostat supports geofencing, which uses your smartphone’s location to automatically adjust temperatures when you leave or arrive home. This feature optimizes energy usage by learning your schedule and preferences. Additionally, remote access via the Honeywell Home app allows you to control your thermostat from anywhere, ensuring your home is always at the perfect temperature. These features work seamlessly with smart home systems, enhancing convenience and energy efficiency while providing peace of mind through real-time monitoring and adjustments.
8.3 Energy-Saving Modes
The Honeywell Pro Series Thermostat features energy-saving modes that optimize heating and cooling usage. It learns your home’s temperature patterns to reduce energy waste. The thermostat can automatically adjust settings when the house is vacant, using geofencing or your schedule. Energy reports provide insights to help lower consumption. These modes enhance efficiency without sacrificing comfort, making it an eco-friendly choice for smart homes.
Troubleshooting Common Issues
Identify common issues like wiring problems or display malfunctions. Check connections, ensure proper installation, and restart the system. Refer to the manual for detailed solutions.
9.1 Common Installation Mistakes
- Not turning off power at the breaker box before starting installation, posing safety risks.
- Incorrectly mounting the junction box adapter or failing to level it, leading to improper fit.
- Forgetting to remove the gray trim ring when using the optional cover plate, causing alignment issues.
- Not pushing excess wires back into the wall, risking damage or exposed wiring.
- Improperly aligning the UWP with the thermostat, preventing it from snapping securely into place.
9.2 Resolving Wiring Issues
- Always turn off power at the breaker box before addressing wiring concerns to ensure safety.
- Check for loose or incorrect wire connections, as this is a common cause of thermostat malfunctions.
- Consult the wiring diagram in the manual to verify proper connections for your specific HVAC system.
- Ensure all wires are securely fastened to their corresponding terminals on the thermostat.
- If issues persist, test the system by turning the power back on and monitoring performance.
9.3 Addressing Display or Connectivity Problems
- Ensure the thermostat is properly powered and connected to Wi-Fi for smart features.
- Restart the thermostat by turning power off and on at the breaker box.
- Check for loose wire connections, as this can cause display issues.
- Verify the thermostat is mounted correctly and aligned with the UWP.
- Update the thermostat firmware to resolve connectivity or display malfunctions.
- If issues persist, reset the thermostat to factory settings and reconfigure.

Maintenance and Upkeep
Regularly clean the thermostat display and check for firmware updates. Ensure proper wire connections and refer to the manual for specific maintenance tasks to ensure optimal performance.
10.1 Cleaning the Thermostat
To maintain optimal performance, clean the Honeywell Pro Series Thermostat regularly. Turn off the power at the breaker box before cleaning. Use a soft, dry cloth to wipe the display and exterior. Avoid harsh chemicals or liquids, as they may damage the device. Gently remove any dust or debris from the vents or sensors. Ensure the thermostat is dry before restoring power. Regular cleaning prevents dust buildup and ensures accurate temperature readings and smooth operation. This simple maintenance step helps extend the lifespan of your thermostat.
10.2 Updating Firmware
Regular firmware updates ensure your Honeywell Pro Series Thermostat operates with the latest features and improvements. To update, navigate to the thermostat’s menu, select “Settings,” and choose “Firmware Update.” Connect to your Wi-Fi network to check for and install available updates. Avoid interrupting the update process to prevent potential issues. Once complete, the thermostat will restart automatically. Keeping the firmware up-to-date enhances performance, security, and compatibility with smart home systems. Always follow on-screen instructions carefully to ensure a successful update.
10.3 Regular System Checks
Performing regular system checks ensures optimal performance and energy efficiency. Start by visually inspecting the thermostat and wiring for damage or wear. Check for error messages or unusual behavior. Verify that the thermostat is properly calibrated and responding to temperature changes. Ensure all connections are secure and free from corrosion. Test the system by running a full heating and cooling cycle to confirm proper operation. Regular checks help identify and address issues early, maintaining reliability and efficiency while extending the lifespan of your Honeywell Pro Series Thermostat.
Safety Considerations
Always turn off power at the breaker box before installation or maintenance to avoid electrical shocks. Ensure proper grounding and follow manufacturer guidelines to prevent overheating risks and ensure safe operation.
11.1 Electrical Safety Precautions
Always turn off power at the breaker box before starting installation or maintenance to prevent electrical shocks. Verify the power is off using a voltage tester. Avoid touching live wires or components. Ensure proper grounding of the system to prevent electrical hazards. Never bypass safety features or ignore warning labels. Follow the manufacturer’s guidelines for safe installation and operation. Keep the area dry to avoid short circuits. If unsure, consult a licensed electrician, especially for complex systems. Safety precautions are critical to protect both the user and the equipment.
11.2 Avoiding Overheating Risks
To prevent overheating, ensure proper installation by aligning the UWP correctly and closing it securely without bulging. Keep excess wires tucked into the wall to avoid obstruction. Regularly clean the thermostat to remove dust, which can impede airflow. Check for any blockages near the device that might restrict ventilation. Ensure the system is properly sized for your space to avoid overwork. Update firmware regularly to maintain optimal performance. Address any wiring issues promptly, as poor connections can lead to increased heat generation. Proper maintenance helps prevent overheating and ensures reliable operation.
Warranty and Support Information
The Honeywell Pro Series Thermostat is backed by a comprehensive warranty. For detailed terms and conditions, refer to the official Honeywell Home Thermostat Manual. Contact Honeywell support directly for assistance with any inquiries or issues.
12.1 Understanding the Warranty Terms
The Honeywell Pro Series Thermostat is covered by a comprehensive warranty that ensures protection against defects in materials and workmanship. The warranty period varies depending on the model and usage conditions, typically ranging from 1 to 5 years for residential installations. To maintain warranty validity, proper installation and maintenance are required. For detailed terms and conditions, refer to the official Honeywell Home Thermostat Manual. Registration may be necessary to activate warranty benefits. Contact Honeywell support for any warranty-related inquiries or claims.
12.2 Contacting Honeywell Support
For assistance with your Honeywell Pro Series Thermostat, visit the official Honeywell website to access support resources. You can contact Honeywell Support via phone, email, or live chat for troubleshooting, warranty inquiries, or installation guidance. Ensure you have your thermostat model number and installation details ready for efficient support. Honeywell’s dedicated team is available to address any concerns, providing solutions to ensure optimal performance and user satisfaction with your Pro Series Thermostat.
Conclusion
The Honeywell Pro Series Thermostat installation process is designed to be user-friendly, ensuring seamless integration into your home’s HVAC system. By following the manual’s step-by-step guide, you can efficiently set up and customize your thermostat to meet your comfort and energy-saving needs.
With advanced features like smart home integration and programmable scheduling, the Honeywell Pro Series offers a modern solution for temperature control. Proper installation and maintenance will ensure optimal performance, helping you enjoy a comfortable and energy-efficient home environment for years to come.